Setting Up the MP2 Barcoding Plus Client
- Matt Sneller (Deactivated)
User Guides
After installing the MP2 Barcoding Plus Client application, some setup is required. Please follow the steps below to complete the setup process for the MP2 Barcoding Plus Client.
Start mp2 Barcoding Plus on the device, select Start - Programs - mp2 Barcoding Plus
The first time the application is started you may be prompted for an auth code. Please email the authorization key to support@bluedotsolutions.com for your authorization code. Include your Name, contact information, and Company Name. Once you receive this, you will be able to complete your configuration of MP2 Barcoding Plus.
- The Login dialog is displayed. Log in as the administrator with a User ID of admin and a password of 12345
- Select Utilities - Data Connection and enter the IP Address if the server were mp2 Mobile Products is installed.
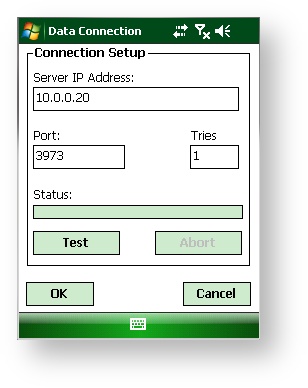
Select the test button.
If the test fails, check the following.
1. Make sure you have a network connection. This can be provided by a wireless network or Windows Mobile Device Center via a cradle connected to your PC.
2. Double check the IP address of the server.
3. Make sure Windows Firewall is either disabled on the server or a allow rule has been added for port 3973- Tap OK to save the setting.
- On the Utilities menu, tap Setup - Database Version and select the type of mp2 database you're using. Tap OK
- If mp2 is Single Site, Warehouse, location and/or Purchasing Center. Tap the corresponding button to enter the default ID. For example, if mp2 is configured for a single site. Select Site - Single Site and enter the Site ID.
- Tap Done to complete the setup and return to the main menu.
- Tap Upload. This will pull mp2 user and security information to the device.
- Tap Utilities - Change Login and login as an mp2 user.
The setup is now complete, repeat these steps for any extra devices that you may have.
Next Step: Testing mp2 Barcoding Plus
Have questions? Email support@bluedotsolutions.com